Create Ventoy Liveboot
How to create a liveboot USB with Ventoy software.
Overview
A liveboot USB contains a full operating system, which lets you use ’live session’ without installing the OS first.
A live session is required to safely install Linux Mint.
In this guide, Ventoy software is used for a more streamlined liveboot experience. This tools lets you select from multiple boot options, so you can install multiple Linux distros to try out on one USB stick.
Details in this guide are specific to users running Windows OS. For users on Linux or macOS, there is official Ventoy documentation available.
Verify Ventoy .zip file
The ventoy-1.1.12-windows.zip file should be verified with the same method used for the Linux Mint .iso.
The download link and online checksum tools are linked below:
The expected hash is found in the sha256.txt file:
04620b546bcc5eeeb5971767595b3713ee3de71580a82449053c53a7cb32fcd9  ventoy-1.1.12-linux.tar.gz
c1345277c8f3a8fcc213945687bcad5ff1d680b1d6b7b7a1cdf85f7d4a368406  ventoy-1.1.12-livecd.iso
e70c505be08d99c55e506832f596c430a9c36f8d087f25542d3f6d332d9b6473  *ventoy-1.1.12-windows.zip
Run Ventoy2Disk.exe
Once the Ventoy files are verified:
Insert the USB to use as the liveboot USB into your computer.
Run
Ventoy2Disk.exeto start the program. This does not need to be run with admin privileges.Select the USB from the list of device names and click Install.
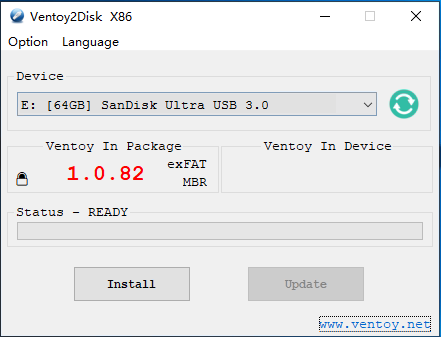
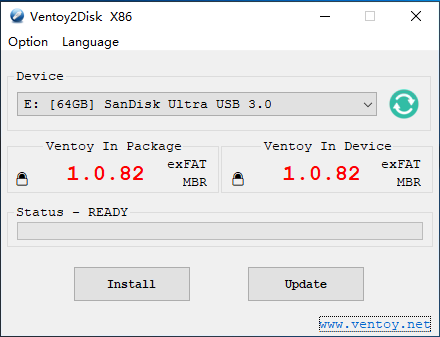
Images of the window interface before and after installation, from the Ventoy website.
This process formats and deletes all contents on the selected USB device. Be sure to select the correct device!
Copy .iso to USB device
Copy the Linux
.isofile into the new Ventoy USB device.This can be repeated for any other
.isofile you want as a liveboot option.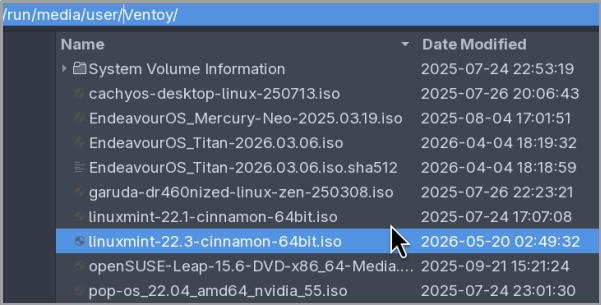
Last updated 23 Jun 2026, 16:10 -0700.